In today’s digital age, having a strong online presence is crucial, especially for creative professionals. Learning how to create a portfolio website for free is now essential to showcase your skills and accomplishments to the world, attracting potential clients and employers. This guide will explore how to build a captivating portfolio website using the popular WordPress platform and the versatile Phlox theme, both of which are free to use.
Why Do You Need an Online Portfolio Website?
An online portfolio website is essential for showcasing your work and establishing a professional online presence.
Here’s why:
Demonstrates your skills: A portfolio allows you to visually display your best work, giving potential clients or employers a clear understanding of your abilities.
Builds credibility: A professional portfolio website instantly boosts your credibility and makes you appear more established in your field.
Attracts clients and employers: Your portfolio is a powerful marketing tool that can help you attract new clients or land your dream job.
Sets you apart: In a competitive market, a standout portfolio can help you differentiate yourself from others and capture attention.
Provides a central hub: It serves as a central location where people can find your contact information and learn more about your services.
Improves SEO: By optimizing your portfolio for search engines, you can increase your visibility and reach a wider audience.
Essentially, an online portfolio is your digital business card. It’s a valuable asset for anyone looking to make a strong impression in their industry.
Why Make Your Portfolio in WordPress?
WordPress is the world’s most popular content management system (CMS) for a reason. Its user-friendly interface, coupled with a vast ecosystem of themes and plugins, makes it an ideal platform for creating professional and visually appealing online portfolios. No matter your creative field – whether you’re a graphic designer, photographer, writer, or developer – WordPress provides the essential tools and flexibility to showcase your work effectively.
Beyond its ease of use, WordPress also excels in search engine optimization (SEO), making it easier for potential clients to find your portfolio. Moreover, as an open-source platform, WordPress is continually updated with new features and security enhancements, ensuring your portfolio remains modern and protected. With the integration of an appointment booking plugin like BookingPress, you can even make it simple for clients to schedule consultations or meetings directly through your site, adding an extra layer of convenience.
WordPress is a popular choice for building online portfolios for several compelling reasons:
- User-friendly interface: WordPress is designed to be accessible to users of all technical levels. You don’t need coding expertise to create a stunning portfolio.
- Customization options: With a vast array of themes and plugins, you can tailor your portfolio to perfectly match your style and brand identity.
- Content management: Easily add, edit, and organize your portfolio items without hassle.
- Open-source platform: WordPress is free to use, making it an affordable option for anyone.
- Affordable hosting: There are numerous hosting providers offering plans to suit various budgets.
- Search engine optimization: WordPress is built with SEO in mind, helping your portfolio rank higher in search results.
- Extensive resources: Benefit from a vast community of users, developers, and designers offering support and tutorials.
- E-commerce integration: Sell your products or services directly from your portfolio if desired.
While we have highlighted the core advantages of using WordPress for your portfolio, there are many more reasons to consider but that’s for another dedicated article.
How to Create an Online Portfolio Website in WordPress with Phlox
WordPress Host
A reliable foundation is essential for any website, but especially for a WordPress portfolio. High-quality hosting ensures your website loads quickly, minimizes downtime, and prioritizes security for both your content and visitor data. Slow loading times can frustrate potential clients and hurt your search engine ranking, while downtime translates to lost opportunities. Reliable hosting also offers features like automatic backups and malware scans, giving you peace of mind and freeing you to focus on creating your best work.
InstaWP stands out as a compelling hosting option for WordPress portfolios due to its unique combination of features, performance, and developer-friendly tools.
InstaWP Key Features
- WordPress-Optimized Infrastructure: Built for high performance.
- Speed-Optimized: Edge caching, CDN, global data centers.
- Seamless Integration: Unified platform for website management.
- Agency-Friendly Pricing: Discounts for multiple websites.
- Managed WordPress: Automated updates, easy migration, expert support.
- Enhanced Security: DDoS protection, WAF, backups, uptime guarantee.
- Streamlined Workflow: Staging, collaboration, one-click launch.
- Developer-Friendly Tools: SSH/SFTP, phpMyAdmin, development tools.
Installing WordPress
https://developer.wordpress.org/advanced-administration/before-install/howto-install/
Installing the Phlox theme
Phlox is a standout WordPress theme renowned for its versatility, speed, and ease of use. Designed to cater to a wide range of websites, including portfolios, it boasts an impressive array of features. Its intuitive interface, coupled with powerful page builders like Elementor and Visual Composer, empowers users to create stunning websites without coding knowledge. With a plethora of pre-designed templates, customizable elements, and advanced portfolio options, Phlox offers unparalleled flexibility in showcasing your work.Phlox empowers photographers, designers, and creative professionals to build captivating online portfolios that leave a lasting impression.
Top Features for a Portfolio Website
- Stunning Portfolio Layouts: Choose from a variety of layouts to showcase your work in style, including grid, masonry, and tile formats.
- Customizable Portfolio Items: Tailor each portfolio item with detailed information, images, and videos to highlight your projects effectively.
- Seamless Integration with Page Builders: Leverage the power of Elementor or Visual Composer to create custom portfolio designs and layouts.
- Responsive Design: Ensure your portfolio looks impeccable on all devices, from desktops to smartphones.
- SEO Optimization: Improve your website’s visibility in search engine results with built-in SEO features.
- Fast Loading Times: Enhance user experience with optimized performance and quick load times.
- Regular Updates: Benefit from continuous improvements and security patches with regular theme updates.
- Excellent Customer Support: Rely on the Phlox team for assistance and troubleshooting.
- One-Click Demo Import: Quickly set up your portfolio website with pre-designed demos.
Master Slider Pro Included: Create captivating slideshows to showcase your work dynamically.
To install Phlox, click on the “Add new theme” option in the Themes menu, then search for “Phlox” and it will appear in the results. After that, click on the “Install” and then “Activate” buttons.
Importing a free and ready-to-use Portfolio Demo
After installing and activating Phlox, you will be automatically redirected to its dedicated dashboard. The next step is to import a ready-made demo. To do this, simply go to the “demo importer” menu in the dedicated Phlox dashboard.
Here, you will find a large number of free and Pro demos available for use.
If you search for the word “Portfolio,” you will be shown attractive options. One of the options is called “Creative Portfolio,” which you can select and import.”
After clicking the “Import” button, the process of importing the demo content begins.
Step 1: Continue. Click the “Continue” button to proceed to the next step.
Step 2: Install the required plugins. A list of plugins essential for importing this specific demo will be displayed. Click the “Install plugins” button to install these necessary plugins automatically. These additional plugins will enhance the functionality of your website.
Step 3: Import Content. Select the first option, to import all the content from the demo, including pages, posts, images, and other elements. Then, click the “Import content” button to initiate the import process.
Wait for Completion. The import process will start, and it may take a few minutes to complete. During this time, please be patient as the system transfers all the demo data to your website.
Once the import is finished, the demo content will be fully integrated into your website, providing you with a ready-to-customize starting point.
Here is the full display of the imported portfolio demo:

Website Customizations
To customize various parts of WordPress and specifically Phlox, we use the “Customize” option found in the “Appearance” menu. This is where you’ll find the general options for WordPress and the theme you’ve installed. For a deeper understanding of the Customize feature, you can refer to this link:
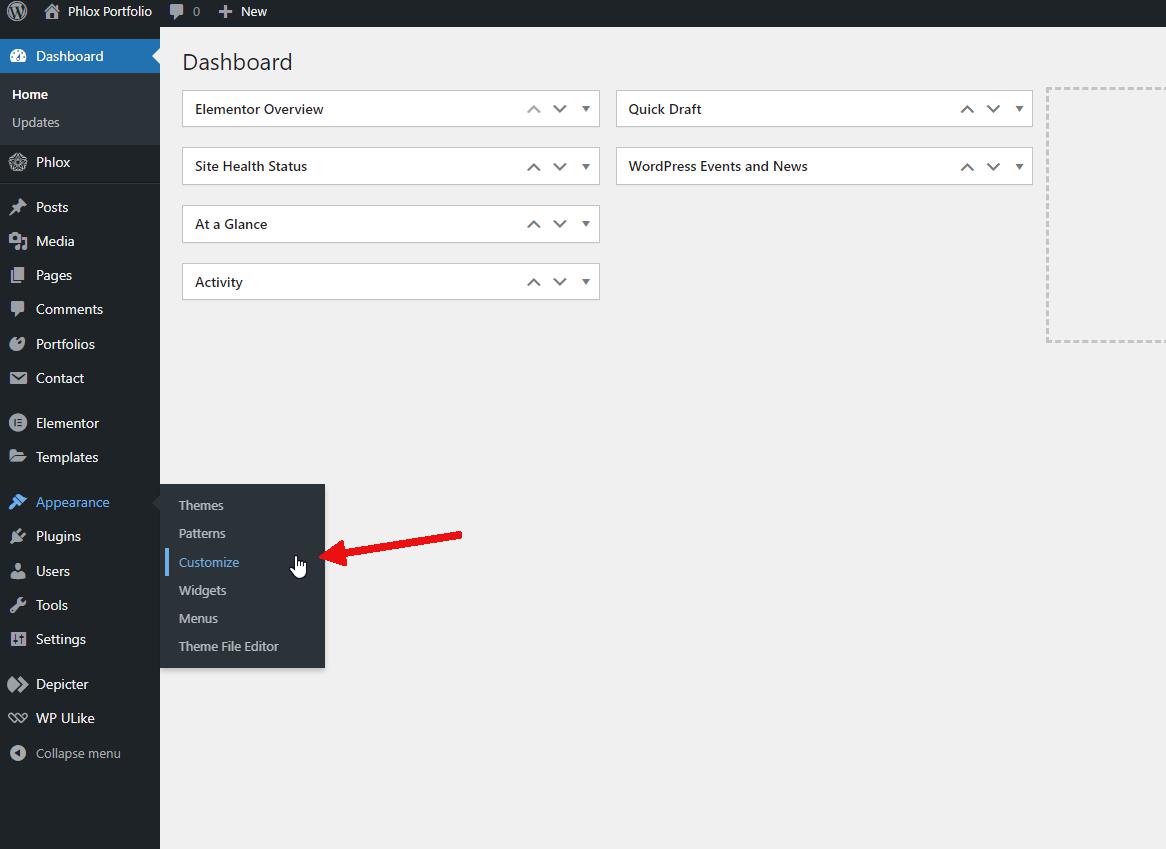
It’s logical that the first thing you’d want to do is customize your website based on your brand and identity. So, the first option you should explore in the Customizer is “Site Identity”.
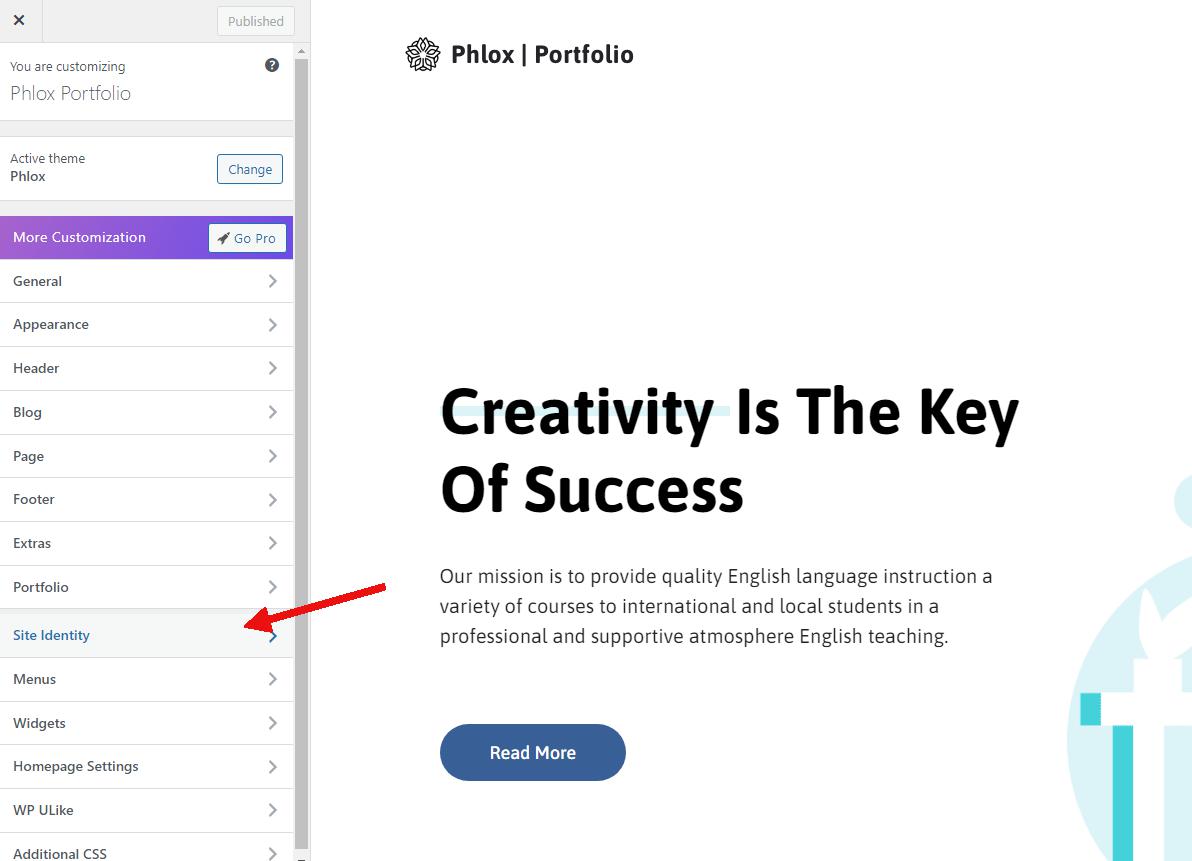
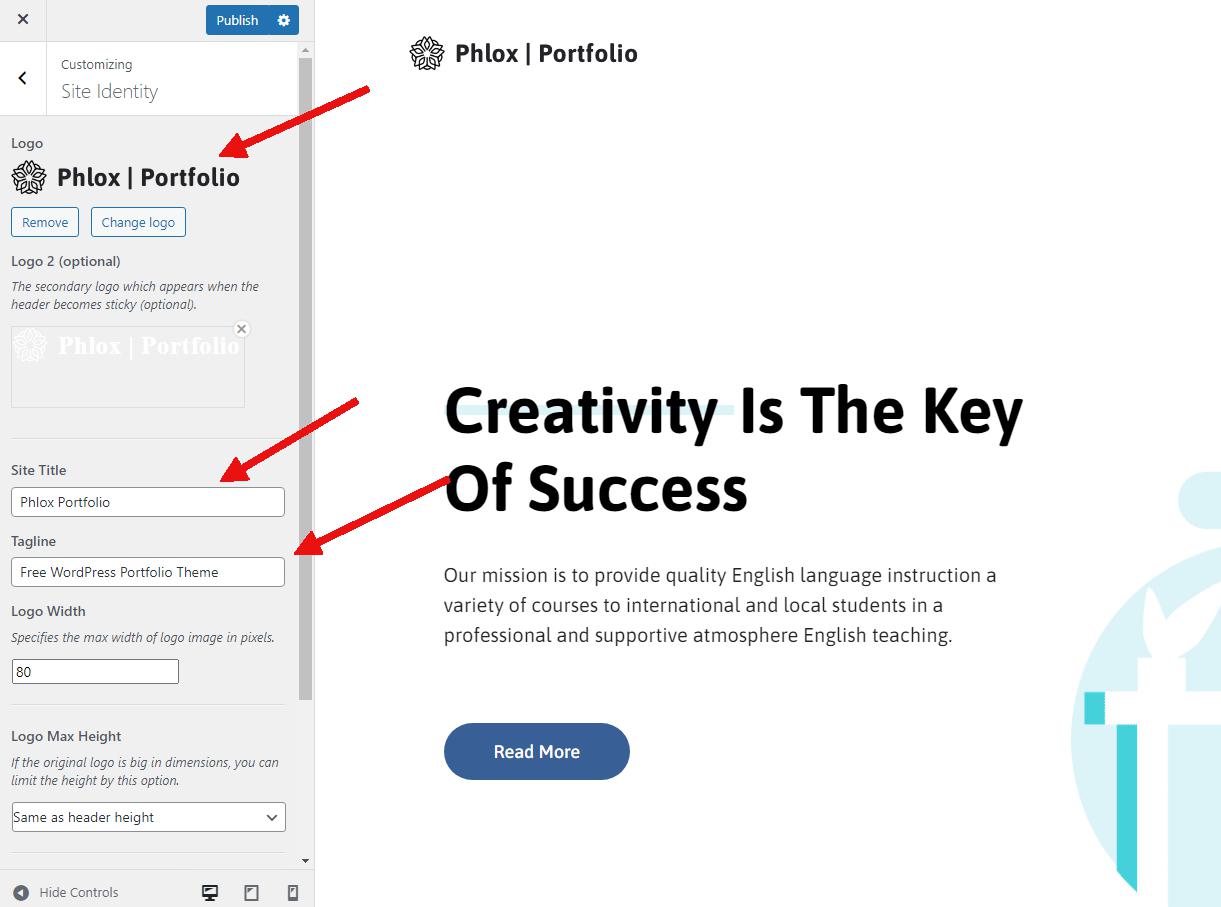
Here, you can modify elements like your site’s logo, title, and tagline using the available options.
Certainly, there are more customizations required to create a website that perfectly reflects your personality, but these options provide a great starting point.
Next, let’s move on to customizing your portfolio options. Within the Customize menu, you’ll find various submenus that allow you to personalize and select different options for various sections of your website’s portfolio.
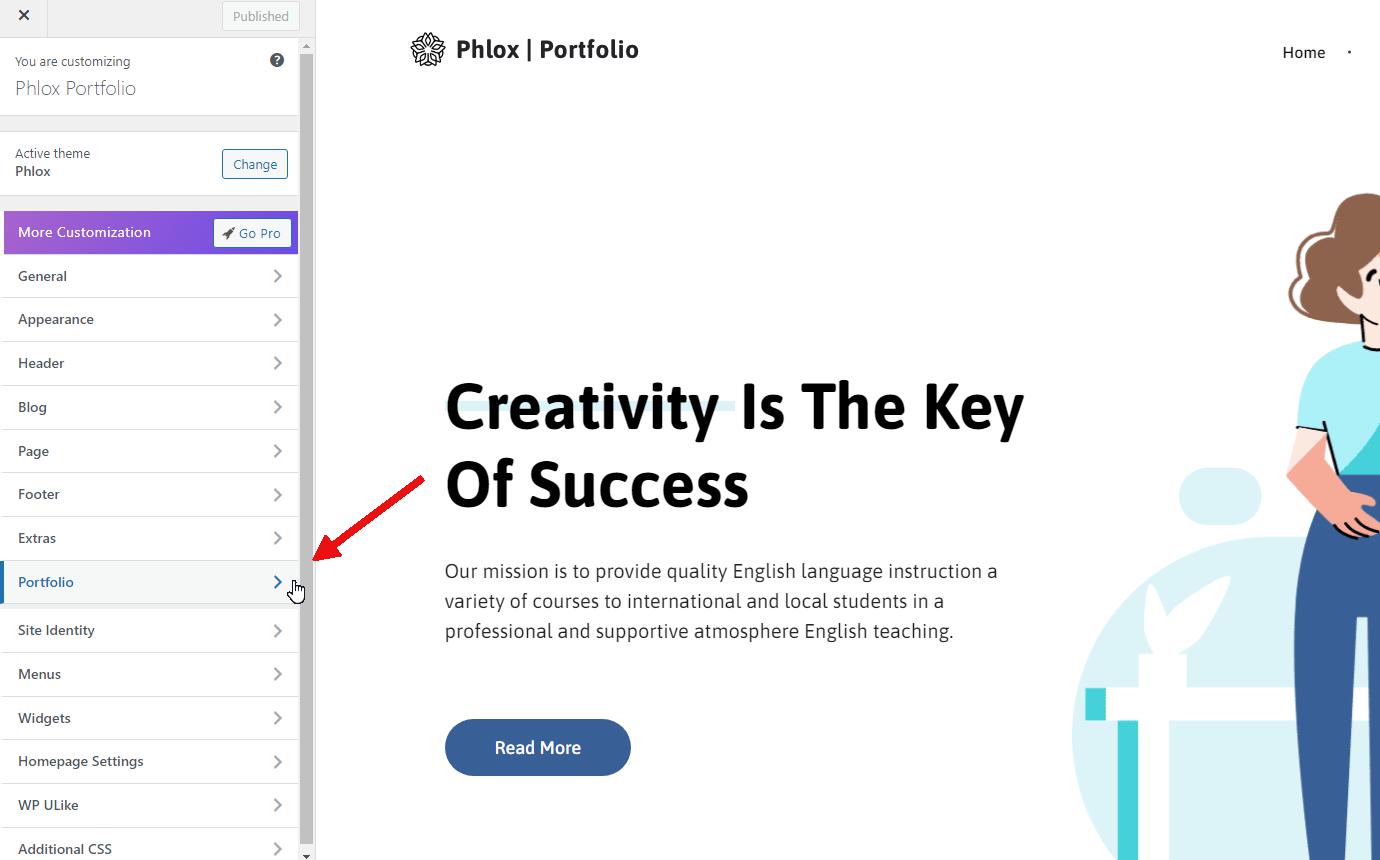
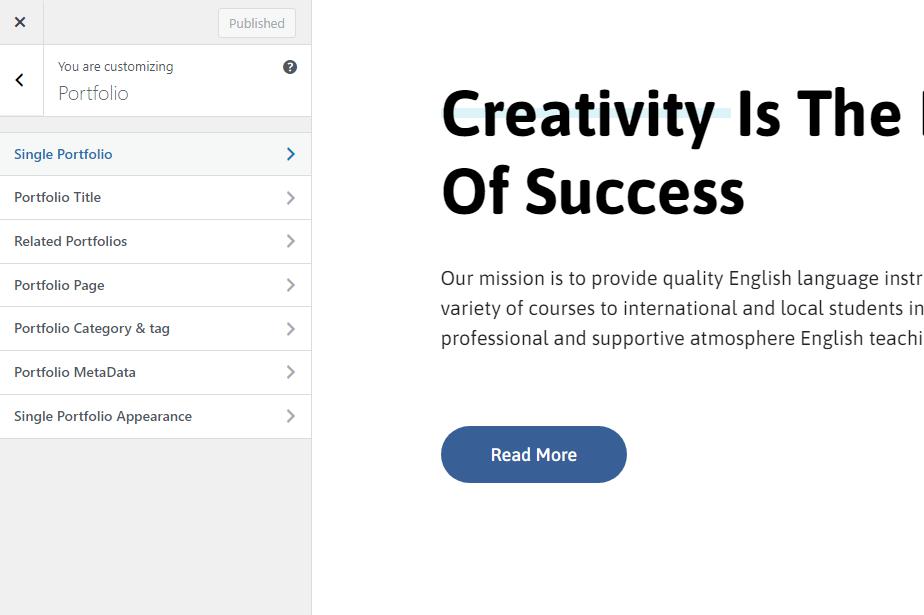
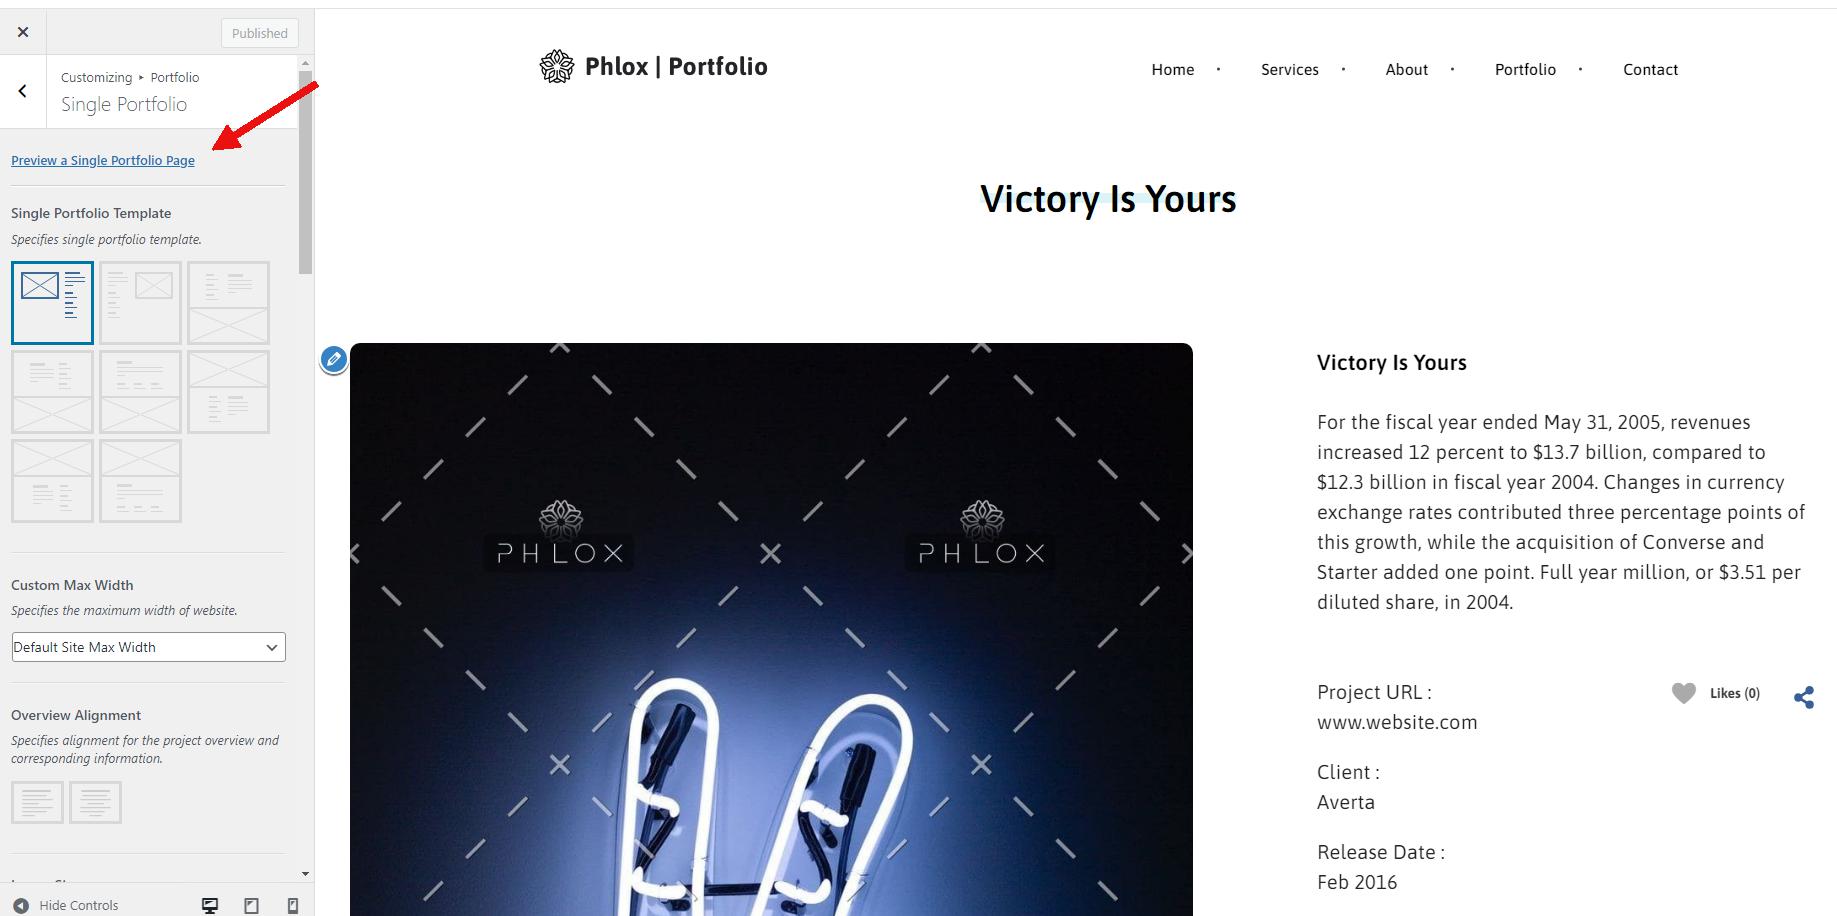
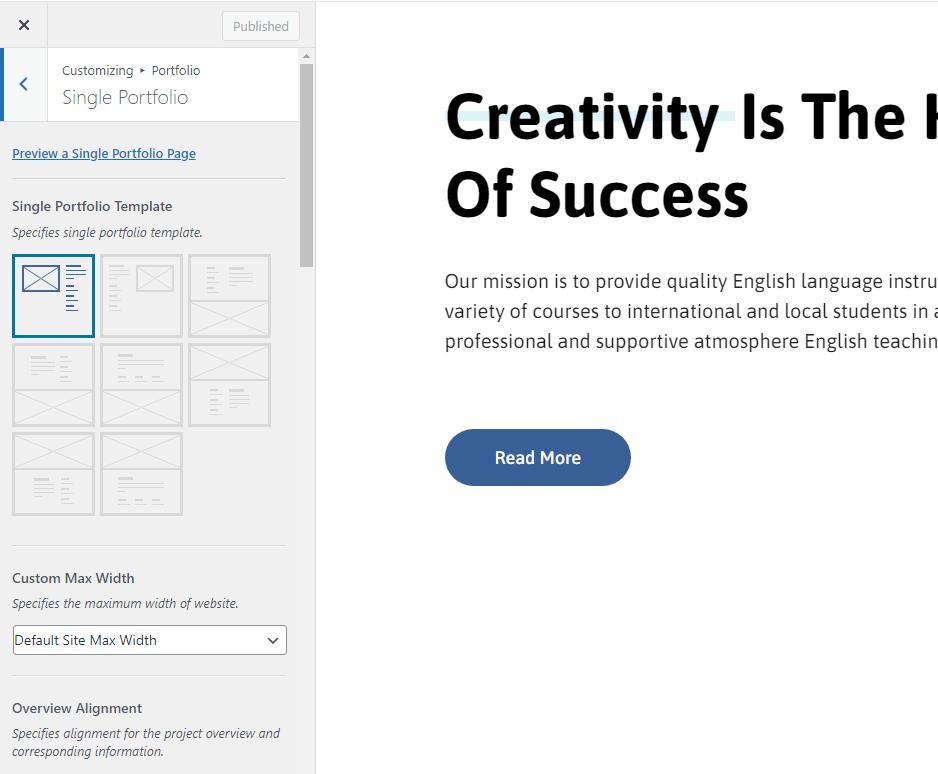
Start by clicking on “Preview a single portfolio page” from the “Single Portfolio” menu. This will load a sample portfolio item on the right-hand side for preview purposes. On the left-hand side, under the “Layouts” section, you can select different layout options. You’ll see the changes reflected in the preview on the right as you make your selections.
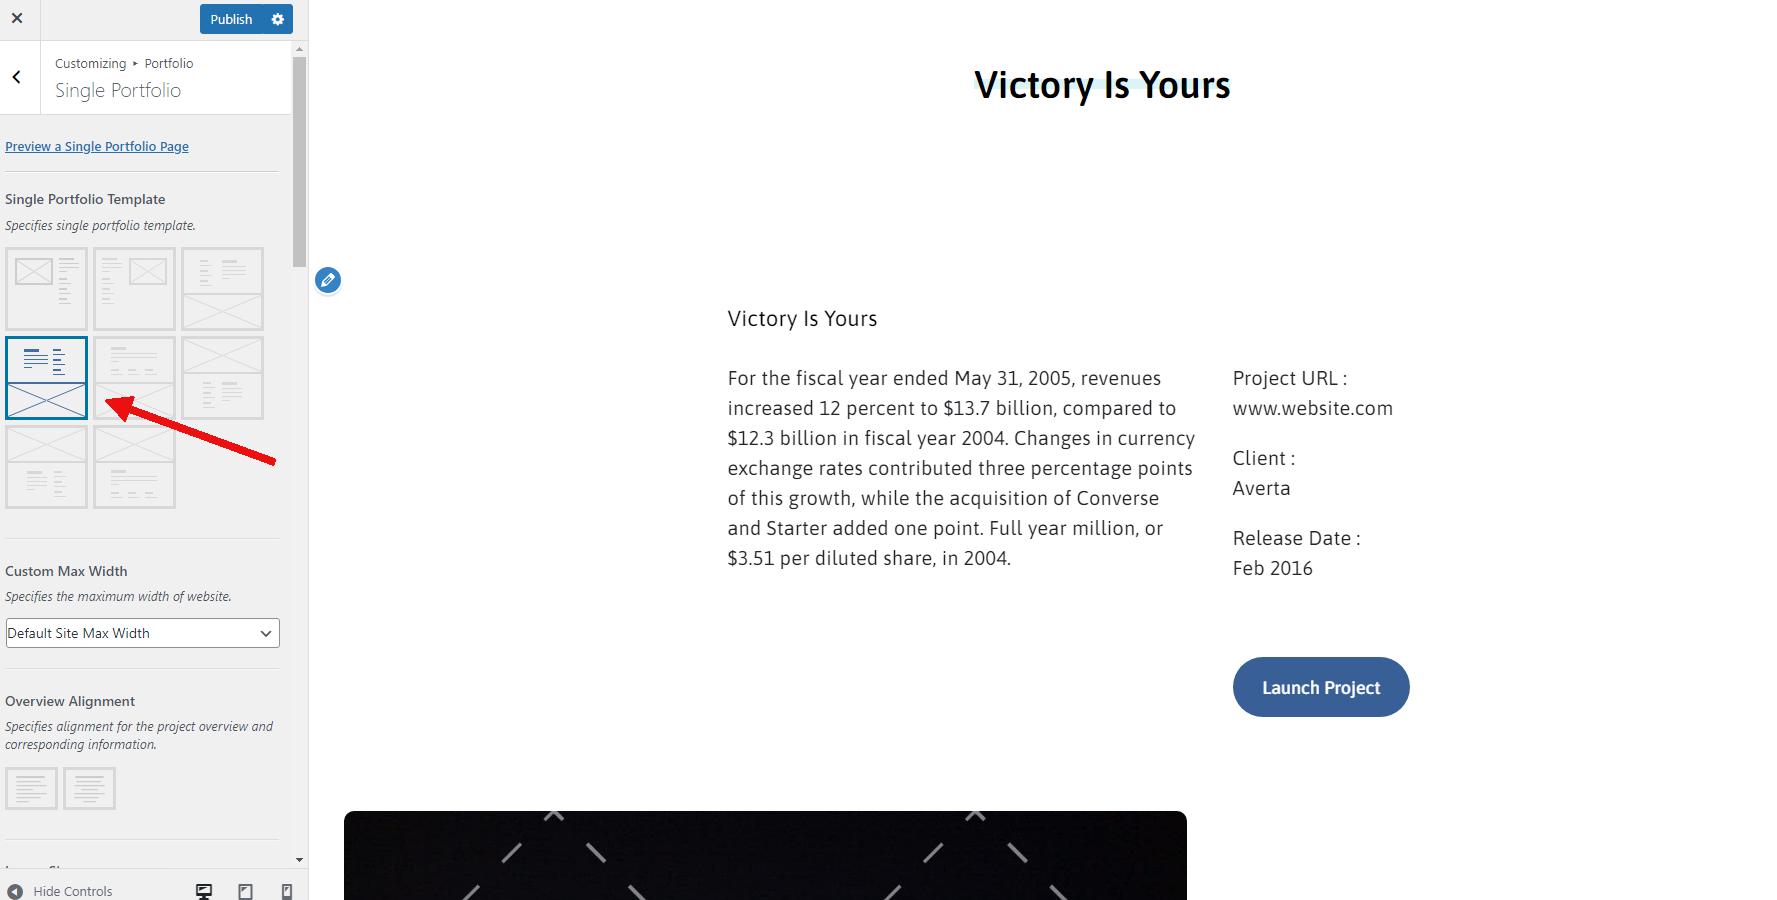
To save any changes made within the Customizer, be sure to click the “Publish” button at the top. By following this process, you can customize various aspects of your website’s portfolio to your liking.
Conclusion
FAQs


