When creating a visually appealing and user-friendly website, having consistent headers across all pages can be beneficial. However, there are times when you may want to differentiate certain pages to enhance their unique identity. This is where using different headers for different pages comes into play. For example, if you have pages with a light-themed design and a homepage with a darker aesthetic, using distinct headers can help visually separate these sections and provide a more immersive experience for your visitors.
Another common scenario is when you want to display a specific call to action (CTA) button on a particular page only. For instance, you might have a “Subscribe Now” button on your homepage to encourage newsletter sign-ups, but on your About page, you might want to feature a “Contact Us” button instead. By customizing your headers, you can tailor the user experience and guide visitors towards the desired action.
Understanding Header Templates in Phlox
Phlox header/footer builder lets you create unique headers and footers with different structures and layouts for desktop, tablet, and mobile. You can add rows and columns by Elementor Page Builder, and customize the look of the header and footer by adding or removing elements. You are able to use all the available elements (such as the horizontal menu, burger menu, search box, social media icons, welcome message, contact numbers, custom icons, call to action buttons, subscription box, shopping cart, …) without any limitation. Also, It is possible to see the changes in real-time.
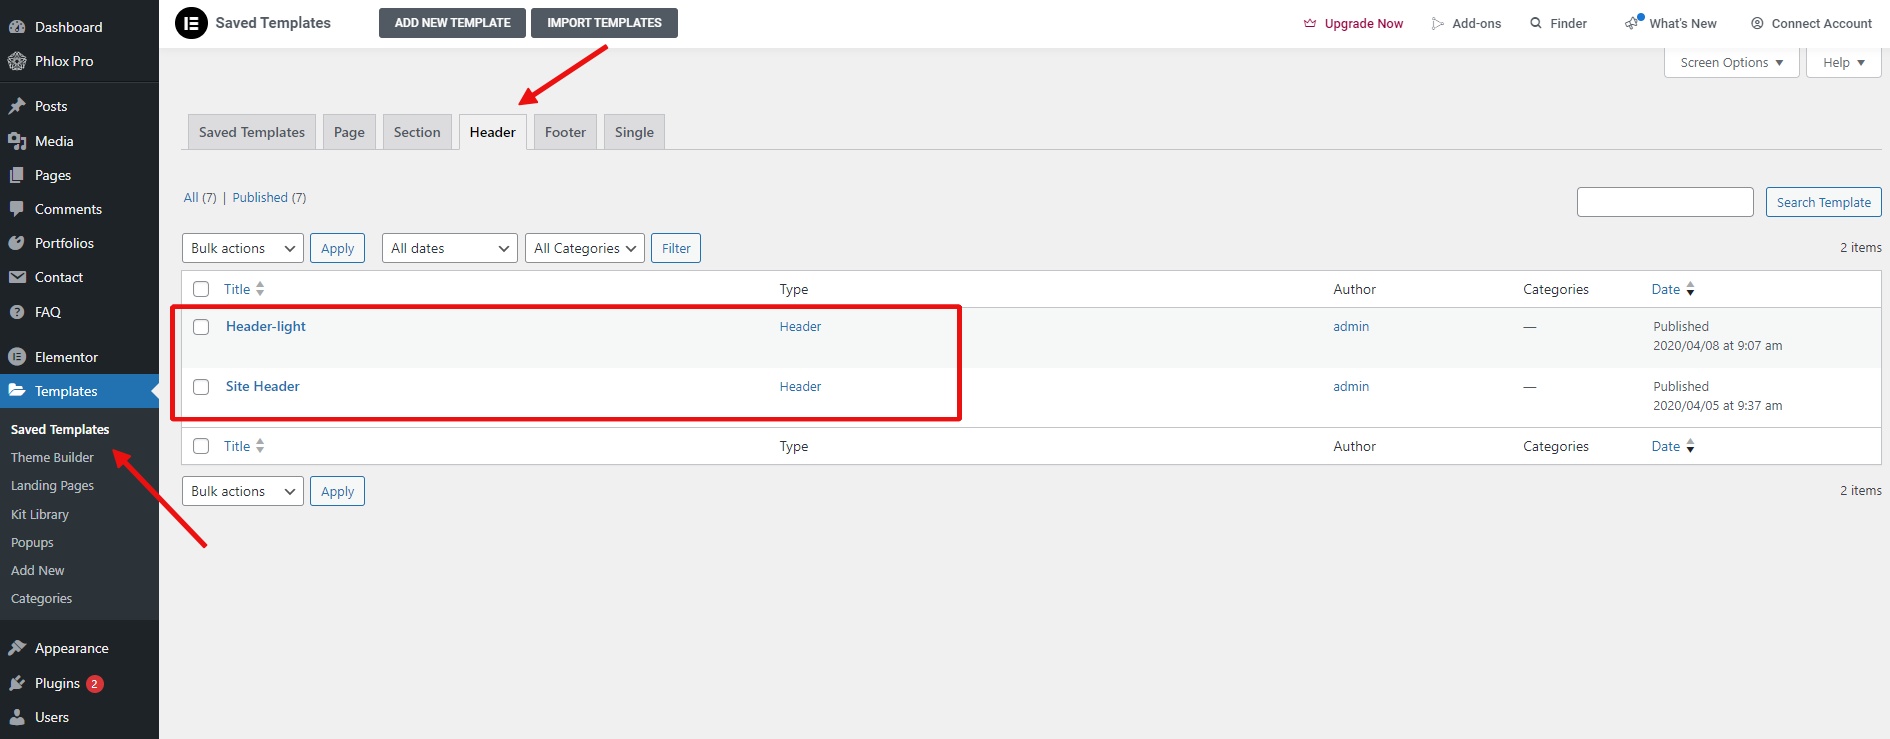
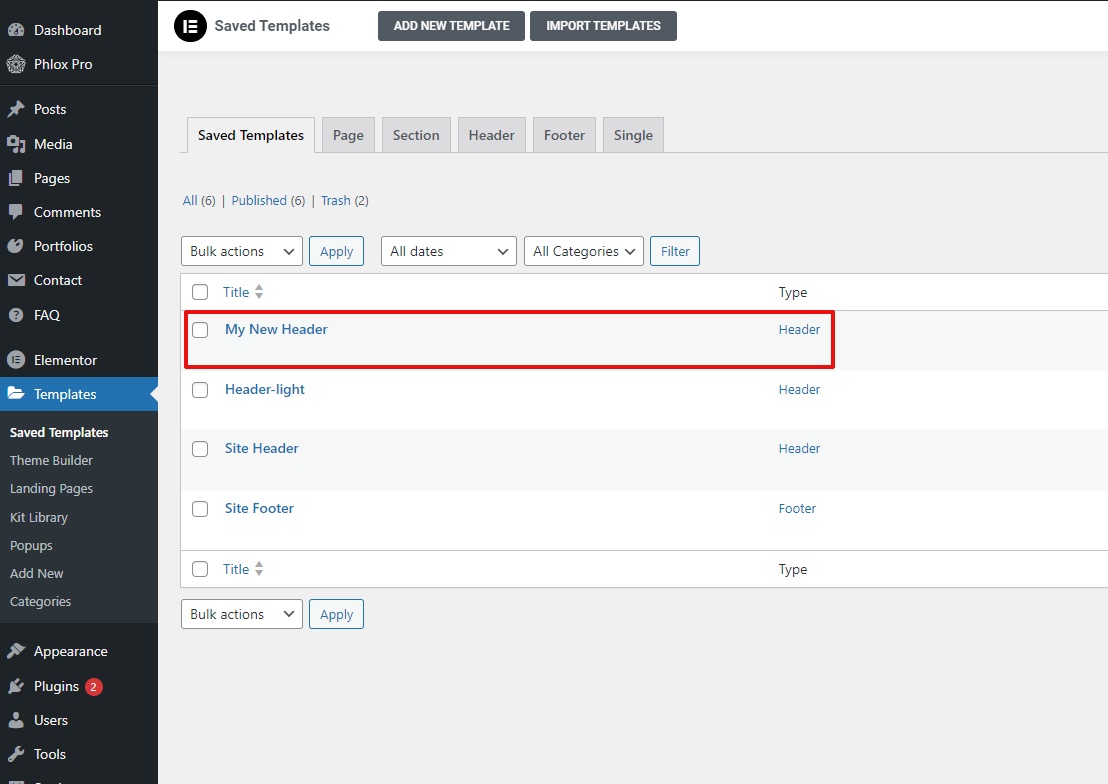
The header builder is an Elementor-based visual builder and to access it, you need to navigate to the Header tab in Templates -> Saved Templates.
Creating and Assigning Header Templates
In this example, we’ve used the pre-built ‘Corporate 2024‘ demo from Phlox, where the Header templates are already prepared.
You can view these pre-designed Header templates by going to the menu: Templates > Saved Templates > Header section.
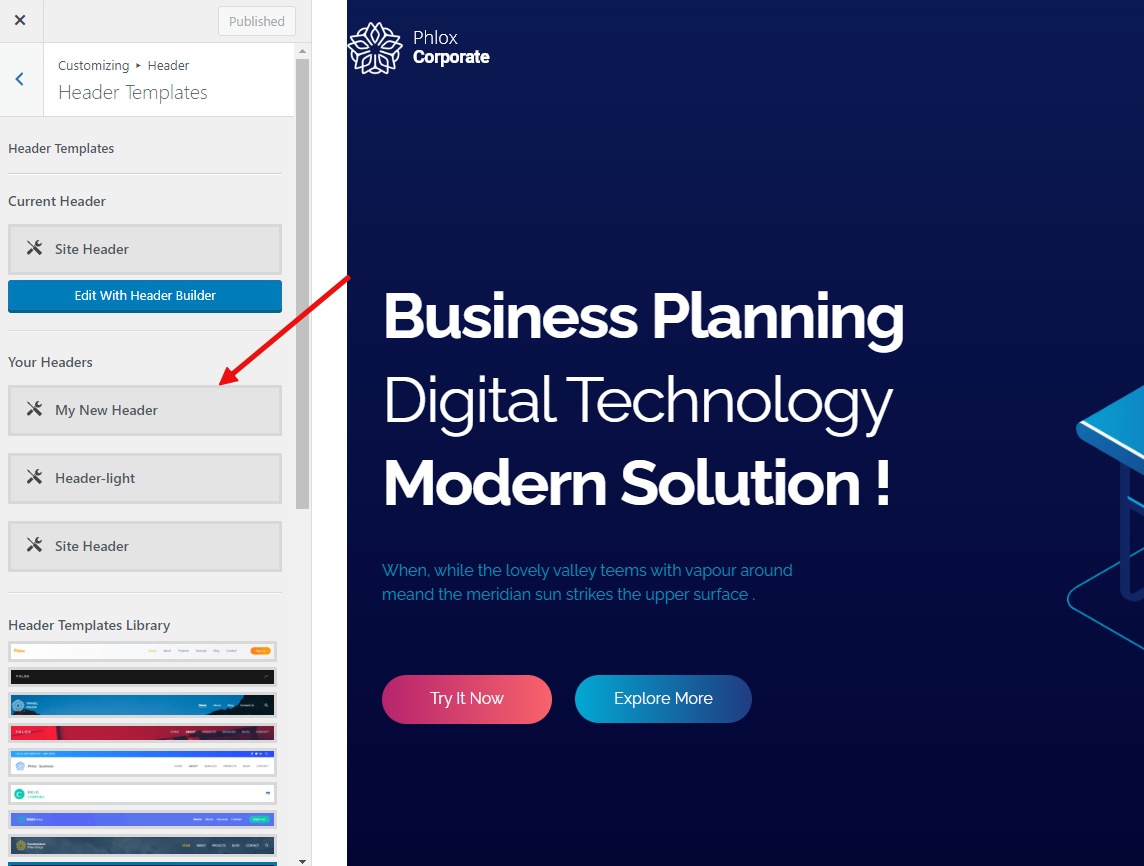
Also in the Customizer, under Header > Header Templates, we can view the available Header templates and identify the current default.
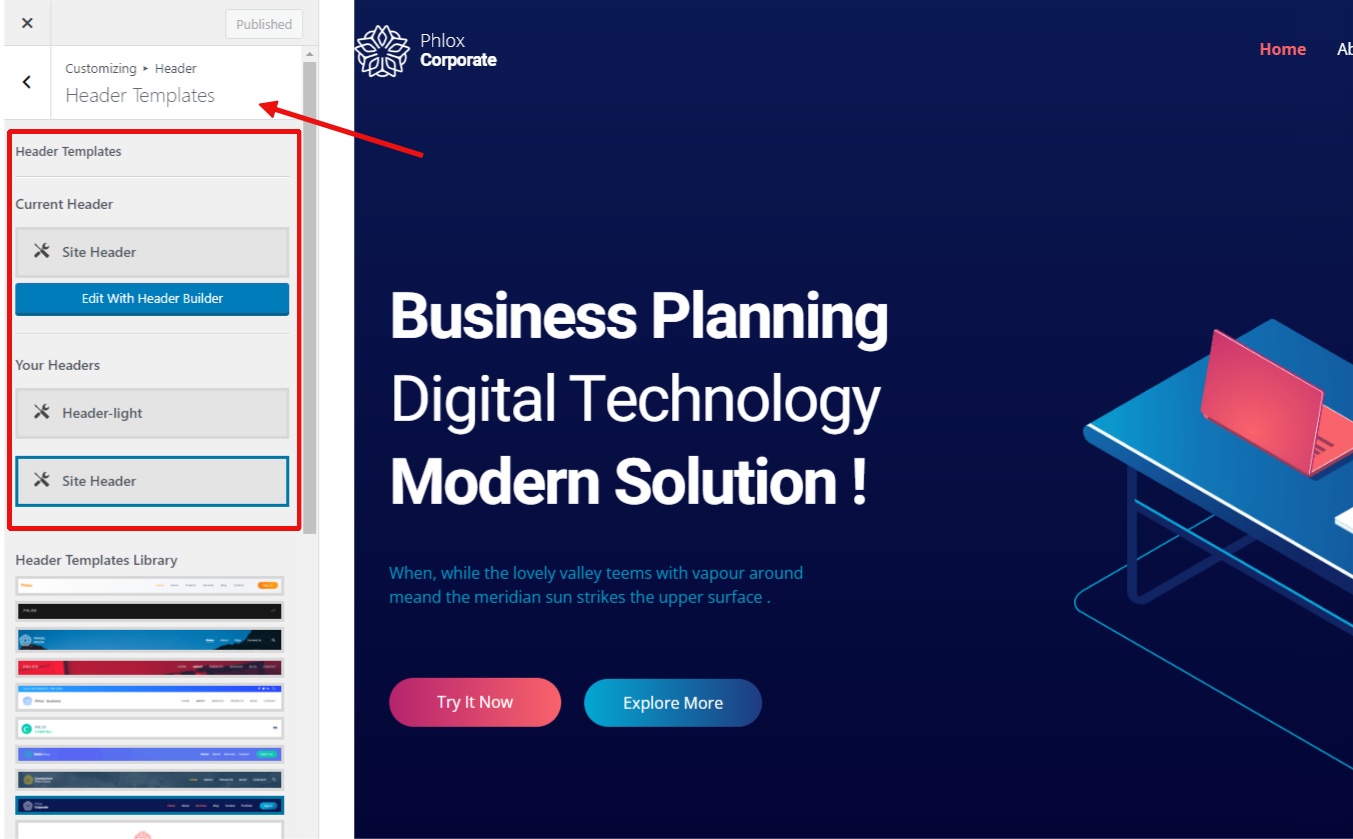
It’s important to note that the template selected as the ‘Current Header’ in the Customizer is displayed for the entire website and all pages; in other words, it’s global. For instance, in this demo, regardless of which page we visit on the website, the template named ‘Site Header’ is displayed, featuring dark font and logo.

However, on the homepage, we see a light-colored logo and font, which is the ‘Header light’ template that we will discuss in the next section.

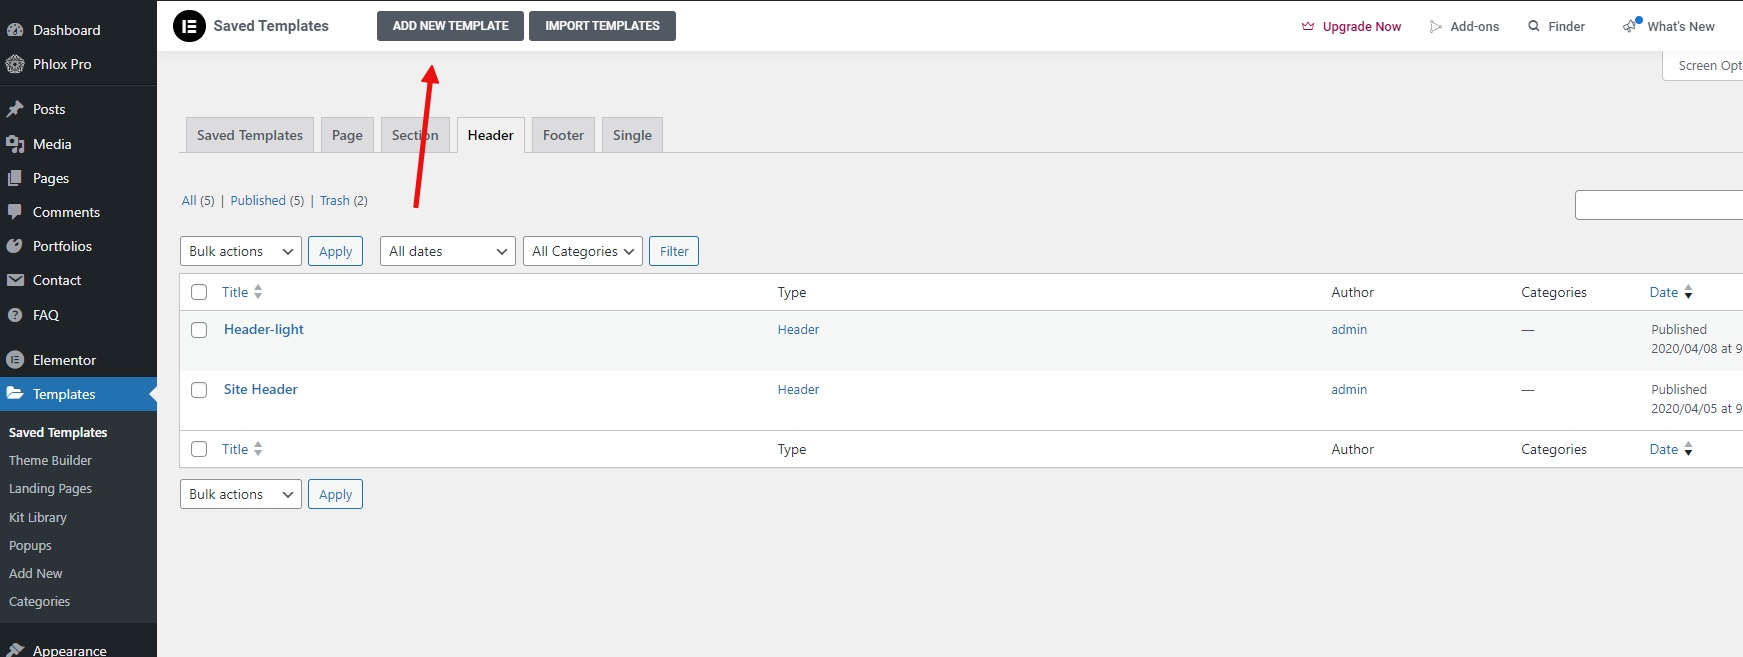
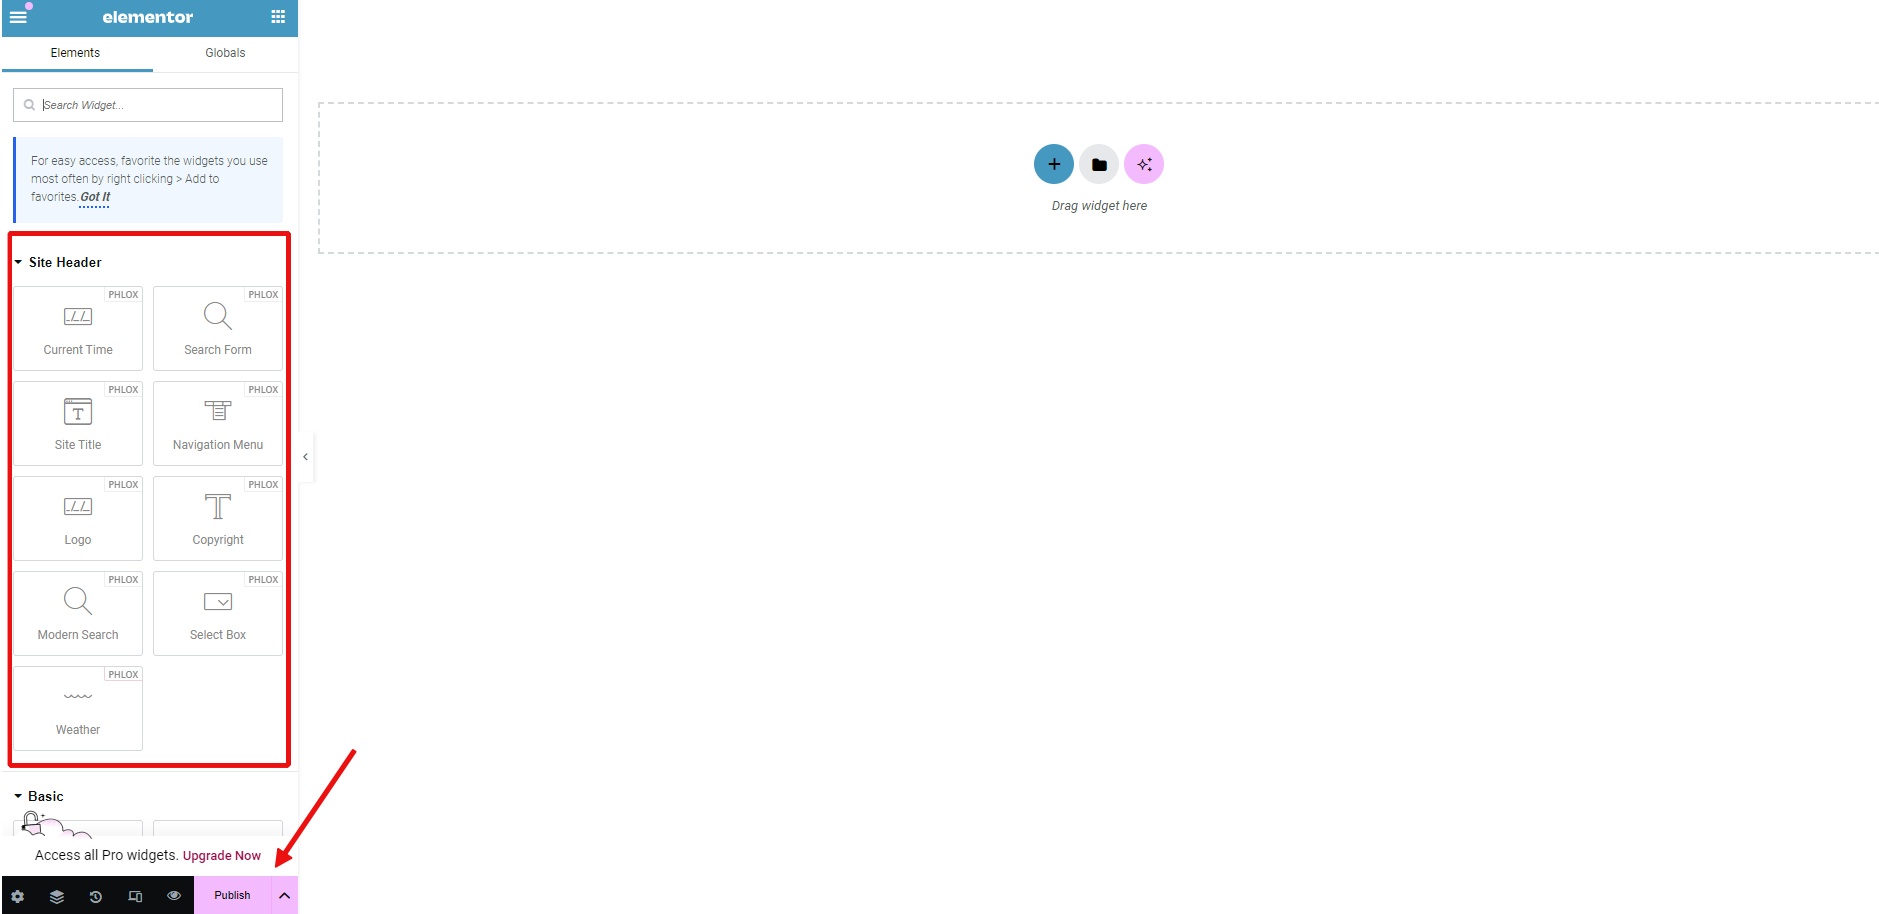
To create a new header template, simply navigate to the Saved Templates menu and click on the ‘Add New Template’ option.
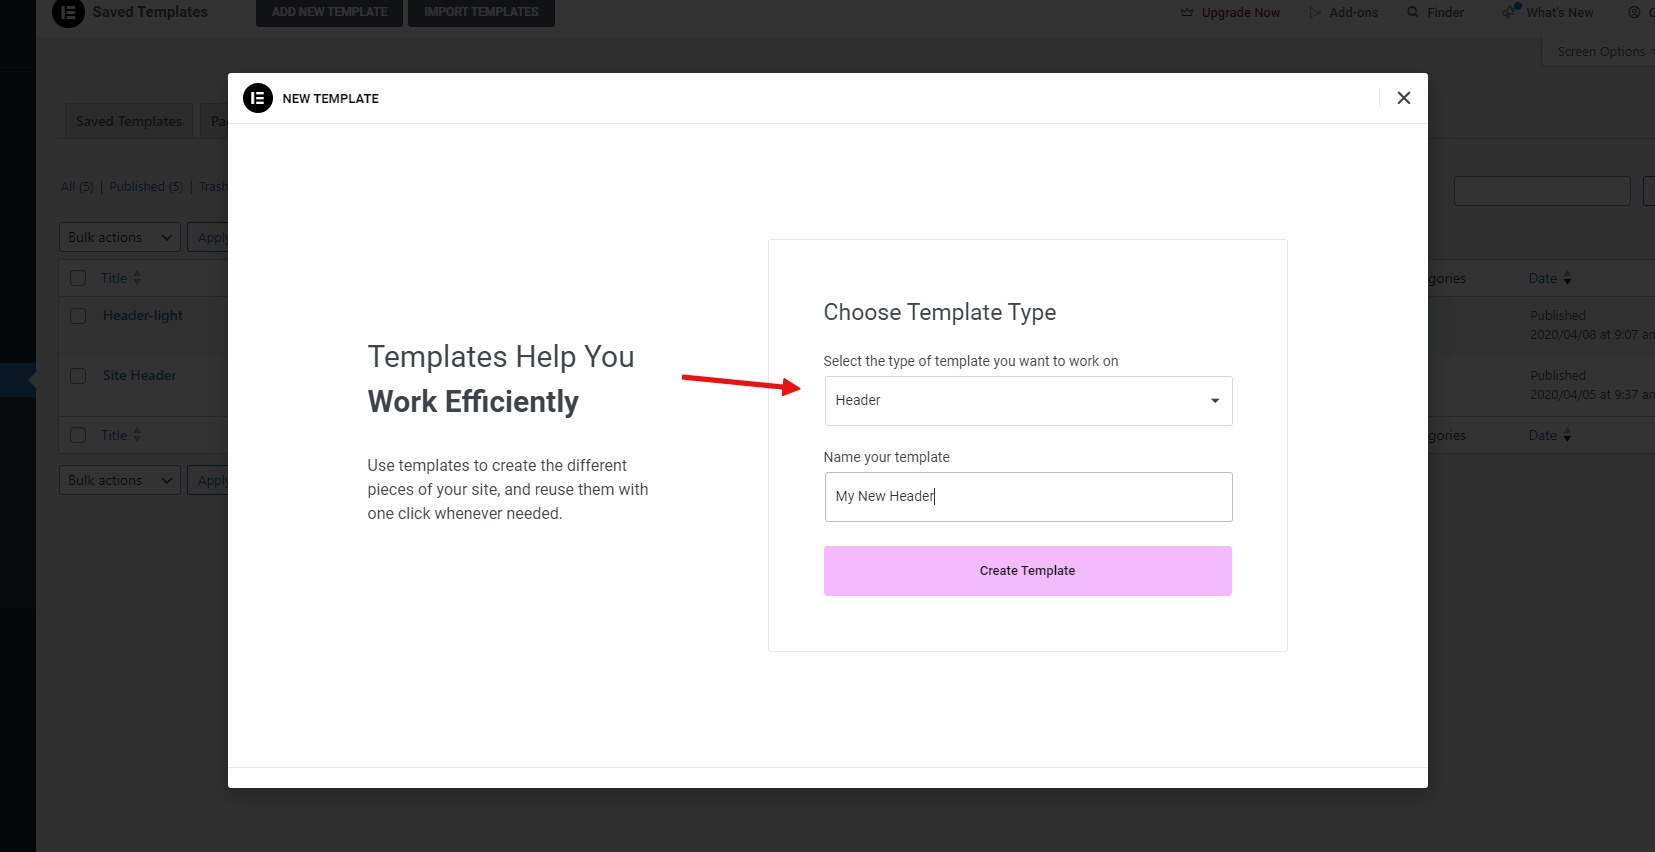
Next, set the ‘Template Type’ to ‘Header’, give it a name, and click the ‘Create Template’ button.
Elementor will then open, allowing you to design and save your custom header template.
[the video]
Your newly created header will now appear in the list when you go back to the Customizer or Header templates section.
Using the Page Options Panel
Now, let’s get to the main point. To make one of your pages have a different header than the global header selected in the Customizer, simply edit that page with the default WordPress editor.
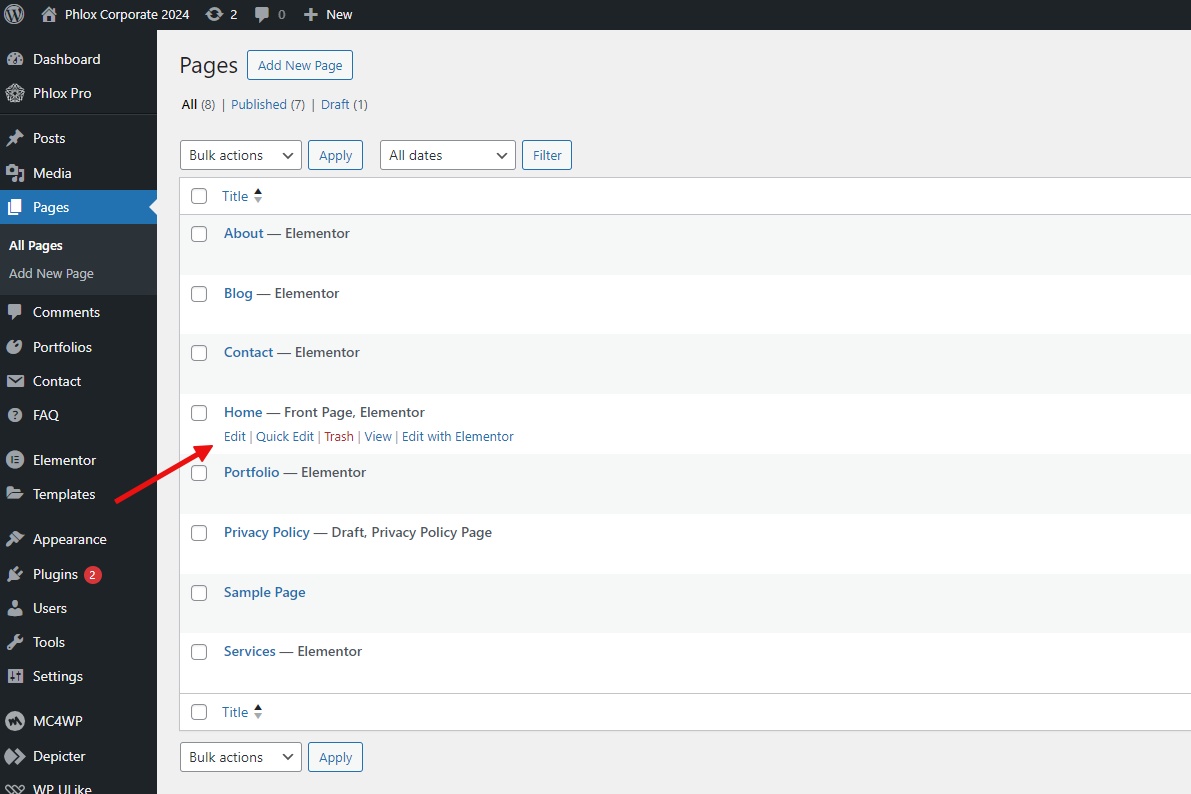
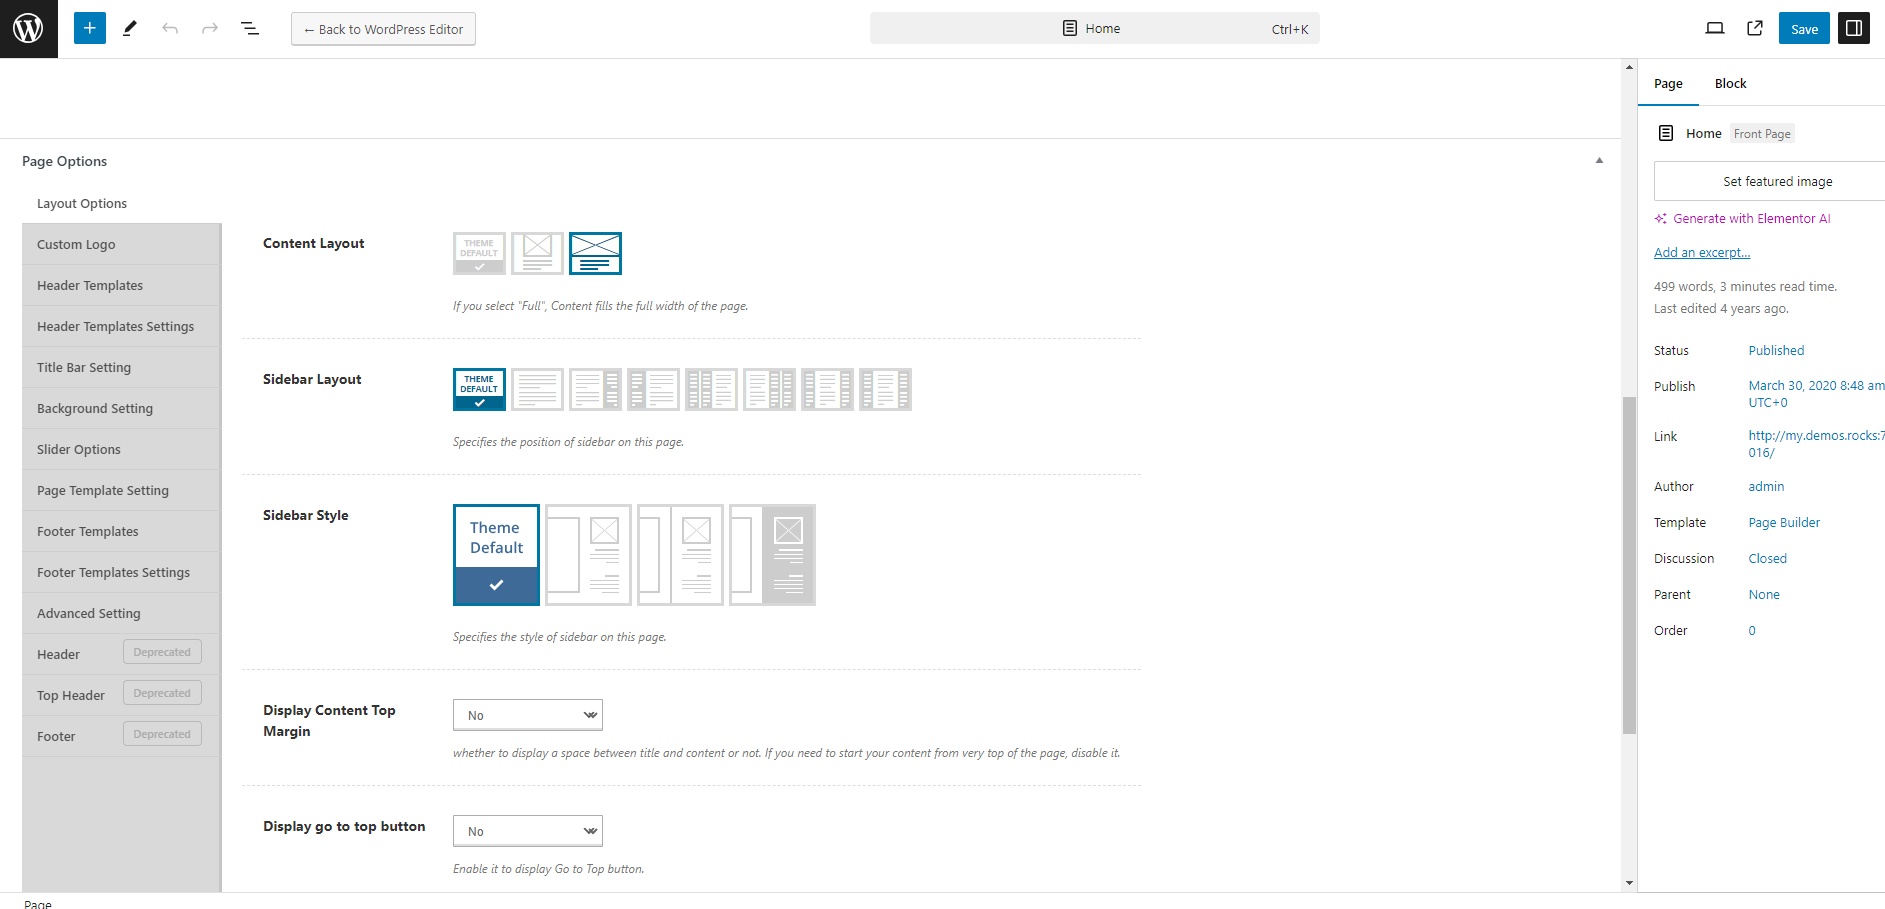
If you scroll down a bit, you’ll encounter the Page Options section of the Phlox theme. Using the options provided in Page Options, you can make changes specific to that page. In fact, by default, Page Options doesn’t make any changes to the options set in the Customizer for all pages, but you have the ability to customize each of these options for this specific page.
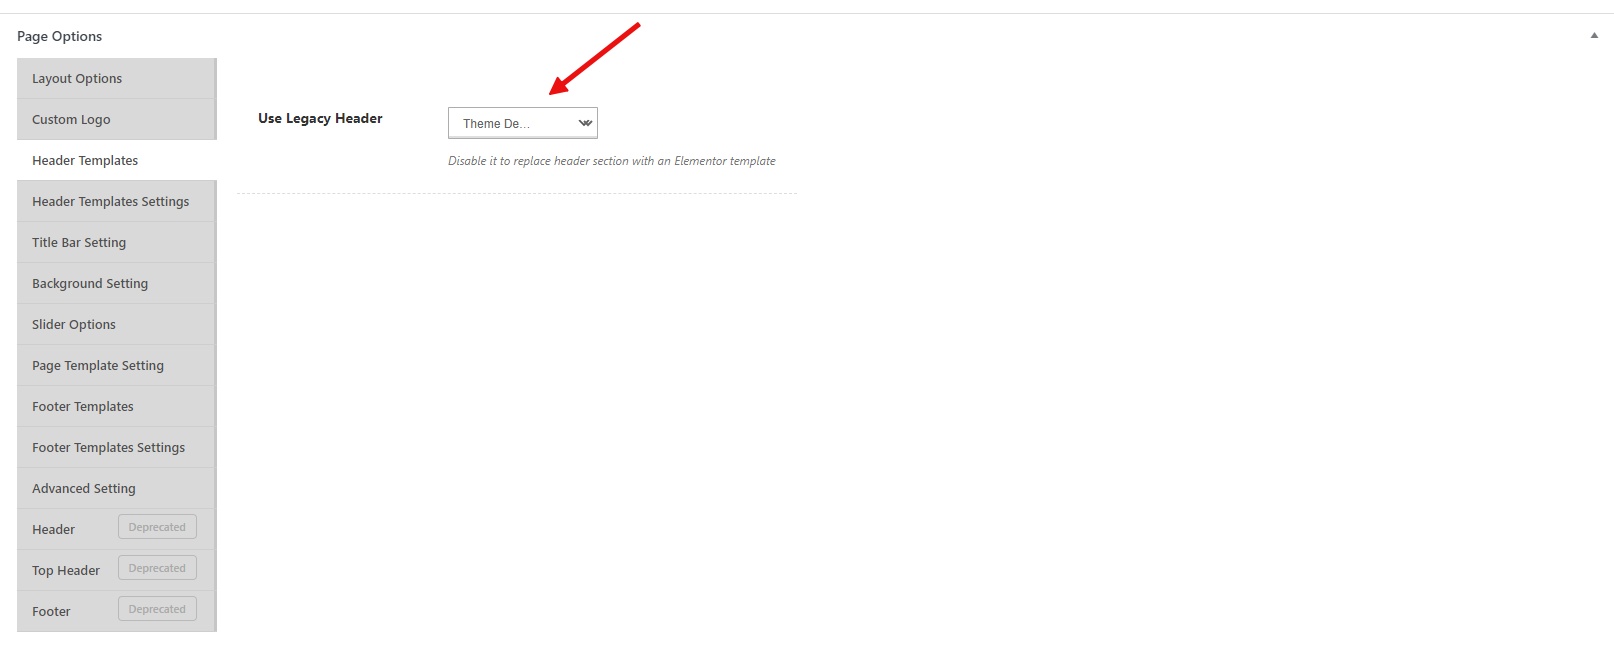
From the Header Templates section, set the ‘Use Legacy header’ option to ‘No’.
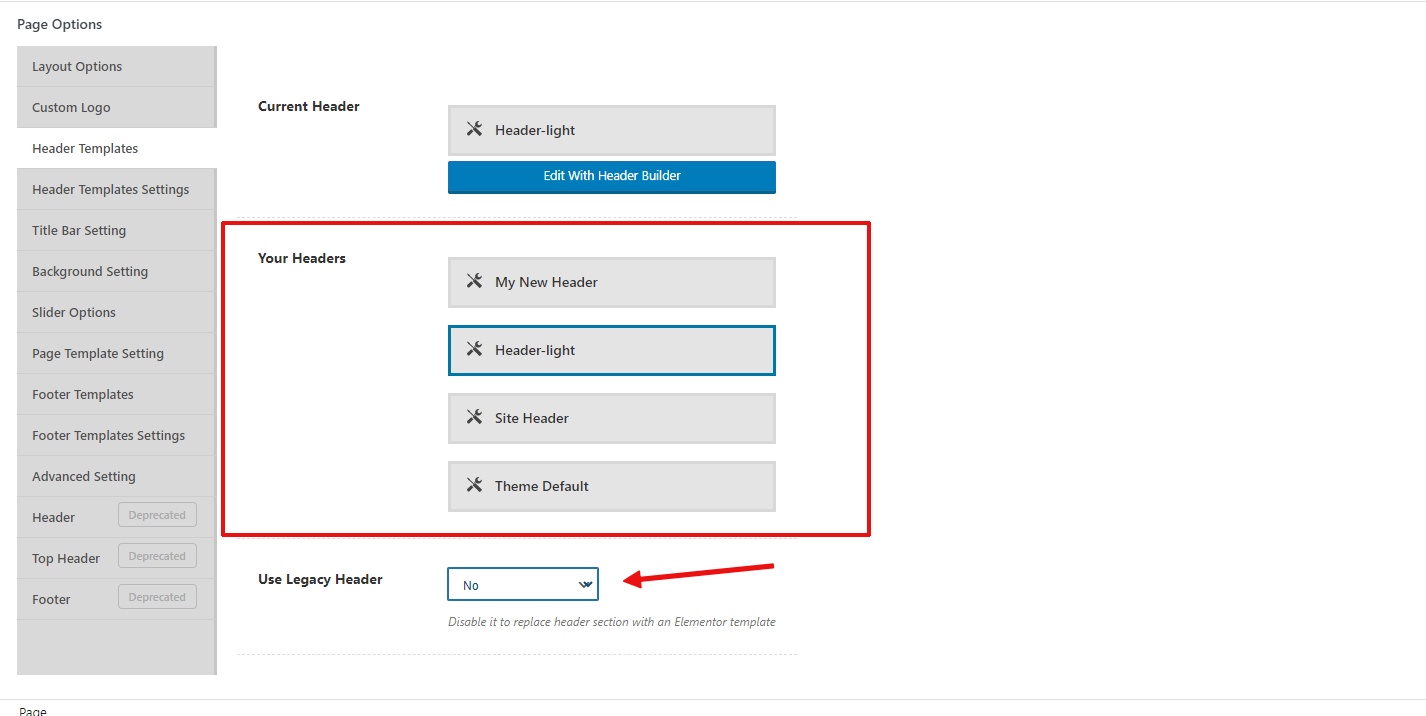
Then, select the different header that you want to display for this page only.
After updating the page, this page will load this header template, replacing the one from the Customizer panel.
Conclusion
Understanding and effectively utilizing header templates in Phlox can significantly enhance your website’s visual appeal and user experience. By creating and assigning distinct headers, you can establish a consistent brand identity while also tailoring the content presentation to specific pages. This flexibility empowers you to guide visitors towards desired actions, create visually engaging sections, and ultimately improve your website’s overall effectiveness.



Add a Comment
You must be logged in to post a comment